
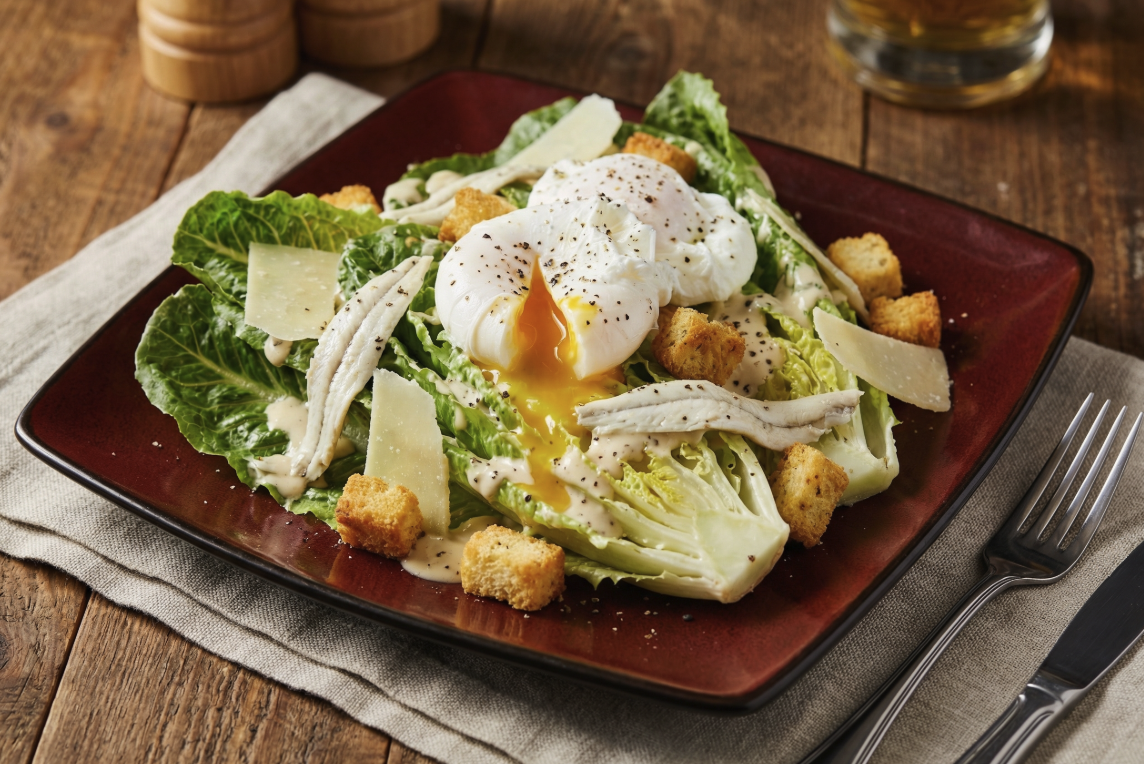
There’s something quietly impressive about a perfectly poached egg. Cut into it, and that golden yolk flows exactly as it should - rich, silky, and just holding its shape until the moment you break it.
But let’s be honest… poached eggs have a reputation. Too many people have been told they’re tricky, temperamental, or reserved for cafés and chefs.
They’re not.
Like most things in the kitchen, once you understand why things work, the process becomes simple, repeatable, and - dare I say - enjoyable.
Let’s strip it back to what actually matters.
Poached eggs are one of those small skills that change how you cook.
Master this, and suddenly:
And that’s what this Kitchen 101 series is all about.
Take your eggs out of the fridge at least 30 minutes before cooking.
That shock difference can cause the egg to spread and cook unevenly.
👉 Room temperature eggs = better shape, better result.
Add about 100ml of apple cider vinegar to your water.
👉 This isn’t about making the egg taste like vinegar—it’s about structure.
You are NOT boiling eggs.
You want a rapid simmer:
👉 If the water looks angry, your eggs will be too.
Give your eggs space.
👉 Crowded eggs = messy eggs.
Crack your egg into a ladle first, not straight into the water.
Then gently lower it into the simmer.
👉 Treat it gently, and it will reward you.
Forget the swirling water trick.
👉 Control beats gimmicks every time.
Eggs can settle and stick.
👉 Stay present—this is a 2–3 minute job, not a walk-away task.
Cook for 2–3 minutes.
👉 You’re in control—adjust to your preference.
Use a slotted spoon to:
Once cooked:
👉 This removes excess water and improves presentation.
You can even gently roll the egg in the cloth to shape it.
A great poached egg should:
👉 This is where home cooking starts to feel like restaurant cooking.
Hot butter + slow pouring = the trick. Add the butter too quickly and the sauce may split.
Hollandaise should be smooth and pourable, not so thick that it sits on the egg like mayonnaise.
If it thickens while you’re finishing the eggs, whisk or blend through a teaspoon of warm water.
And make this one just before serving — hollandaise is at its best fresh.
A traditionally poached egg is cooked directly in gently simmering water. There are other appliances marketed as egg poachers, but it is helpful to understand that they create a different result.
Add a shallow layer of water to a wide frying pan and bring it to a gentle simmer. Carefully lower the eggs into the water, leaving space between them. Spoon a little hot water over any exposed white or briefly cover the pan to help the surface set.
This method allows several eggs to be cooked at the same time, although they may have a slightly flatter shape than eggs poached in deeper water.
These tools hold each egg in a mould above or within the hot water. They can be useful for beginners or anyone with mobility or dexterity challenges, but technically the eggs are predominantly steamed rather than poached directly in water.
👉 That’s steaming, not poaching.
Different method. Different result.
The result will have a smooth, uniform shape and a slightly different texture from a traditionally poached egg.
If you want a true poached egg, cook it directly in water. Egg-poaching pans and silicone cups are convenient ways to cook an egg with a soft yolk, but they should be considered steamed egg - not an alternative poaching technique.
Before we even touch the pan, remember this:
👉 You’re aiming for a firm, set white and a soft, flowing yolk.
Everything we do is about achieving that balance—nothing more, nothing less.
Poaching eggs isn’t about tricks—it’s about control.
Get those right, and you’ll get consistent results every time.
Lift the poached egg carefully from the water using a slotted spoon or spatula. Hold it above the saucepan briefly to allow most of the water to drain away, then place it gently onto a clean kitchen cloth or several layers of paper towel to remove any remaining moisture.
Avoid leaving the egg there for too long, as it may cool or begin to stick. Once drained, transfer it carefully or roll onto the prepared toast or accompanying dish.
Poached eggs should be served immediately while the white is tender and the yolk remains warm and runny. Have the toast, plate, accompaniments and garnish completely ready before removing the egg from the water.
Serve your poached egg:
For the best texture and a warm, flowing yolk, poached eggs should ideally be cooked and served immediately. When preparing only one or two eggs, there is little advantage in making them ahead.
If cooking for several people, the eggs can be poached slightly under the desired doneness, then transferred directly into a bowl of iced water to stop the cooking. Once completely cold, cover and refrigerate for up to 24 hours.
To serve, lower the eggs gently into a saucepan of hot—not rapidly boiling—water for approximately 30–60 seconds, or just until warmed through. Lift them out with a slotted spoon, drain thoroughly on a clean cloth or paper towel, then plate immediately.
Make-ahead poaching is useful when serving a crowd because everyone’s eggs can reach the table together. For an everyday breakfast, cook them fresh -the texture will be better, the yolk warmer and there will be less handling involved.
Adjust the poaching time to suit your preferred yolk:
Cooking time may vary slightly depending on the egg’s size, its starting temperature and the temperature of the water.
The white must always be completely set - the variation is only in the yolk. Watch the egg rather than relying entirely on the clock, then lift and serve it as soon as it reaches your preferred doneness.
Makes: Approximately ½ cup
Serves: 2