
They say we eat with our eyes first — and it’s true.
If your meal looks like a trainwreck, it might taste incredible and be cooked to perfection… but you’ve already lost the battle before the first bite. Food hits the senses in order: sight first, then smell, taste, texture (that all-important mouthfeel), and even sound — think of a sizzling plate arriving at the table. It all builds anticipation before the fork ever hits your mouth.
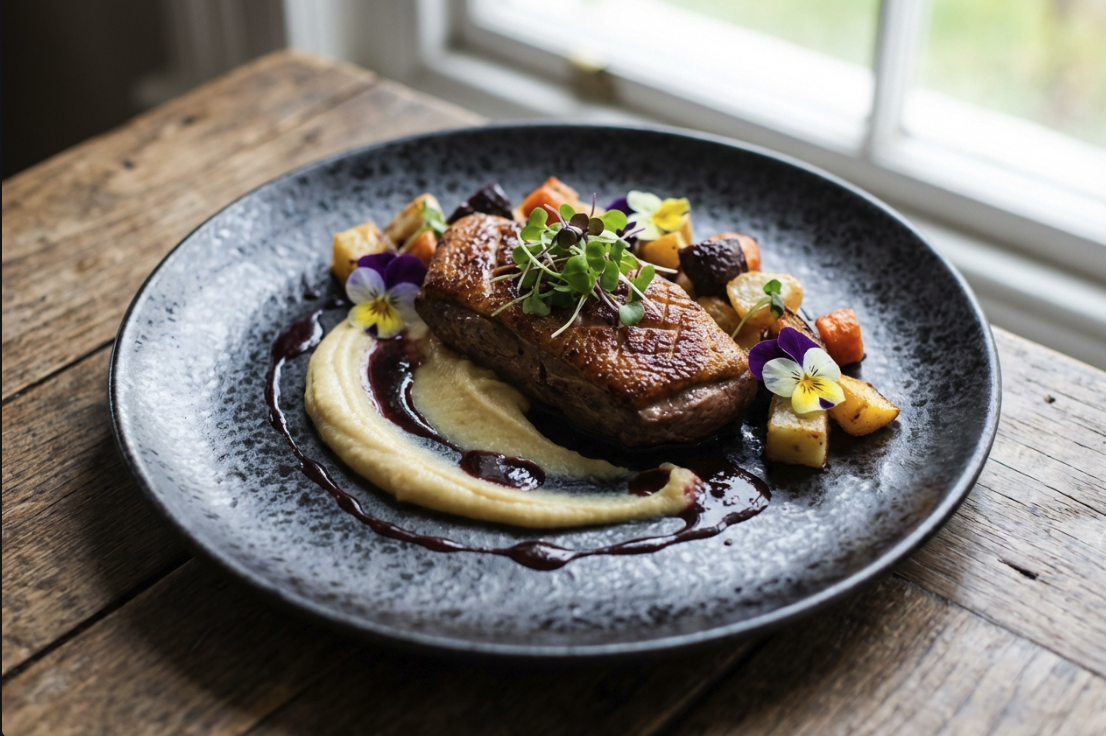
As a former professional culinary judge, our first points were always awarded for initial presentation — your immediate reaction to the dish. I call it the WOW factor. Does the plate make you pause, appreciate, and want to dive straight in? That’s where great plating begins.
Plating isn’t about showing off — it’s about balance, structure, and intention. Your plate is the canvas. Your ingredients are the colour and texture. And your sauces? They’re the brushstrokes.
Let’s turn everyday meals into plates you’re proud to serve.
Before you start stacking, swooping or swirling, think about balance. The old-school “third–third–third” rule (protein, starch, veg) still has its place — but modern plating is more about composition:
Chef’s Tip: Picture a clock face. Place your hero around 4–8 o’clock, starch around 9–11, and veg/garnish around 12–2. It creates a natural flow across the plate.
Your plate is your stage — and it changes how food looks instantly.
Avoid busy patterns — they fight your food.
And remember: size matters. Too small looks cramped. Too big looks like a food island.
Gone are the days of drowning everything in sauce. The modern approach is restraint:
Chef’s Note: Feathering (those dragged 90s sauce patterns) had its moment — now it can look dated. Keep it clean, deliberate, and purposeful.
Height brings drama — but it must have purpose.
Colour = appetite. Contrast = interest.
Chef’s Trick: A drizzle of olive oil, a sprinkle of finishing salt, or a scatter of fresh herbs can turn a plate from flat to photogenic in 5 seconds.
❌ Overcrowding — let the plate breathe
❌ Flat plating — think layers and texture
❌ Uneven portions — balance matters visually
❌ Messy rim — wipe before serving
❌ Pointless garnish — if it doesn’t add flavour, don’t use it
Novice: Clean plating, simple placement
Intermediate: Layering and colour balance
Pro: Texture, height, composition flow
“When your dish lands on the table and someone says wow before they even take a bite — that’s when you know you’ve nailed it. Keep it honest, keep it balanced, and never let the garnish steal the show.”
Get creative with your canvas — and chase that WOW.
Chef Ian