Chef Ian’s Step-by-Step Guide (and why your future self will thank you)
There are some kitchen tricks you learn once, and they pay you back for the rest of your cooking life. Caramelised onions sit right at the top of that list. They’re the quiet flavour heroes — humble, inexpensive, and ridiculously handy once you’ve got a batch tucked away.
I learned this early in my career watching senior chefs keep tubs of caramelised onions in their mise en place like liquid gold. Not just for burgers — for sauces, stews, pasta, mince dishes… anything that needed depth in a hurry.
It’s not hard. It just takes time. And once you’ve made them properly, you’ll wonder how you ever cooked without them.
Recipe
Serves: Makes ~2–3 cups (depending on onion size)
Prep: 10 minutes
Cook: ~45 minutes
Difficulty: Easy (just needs patience)
Ingredients
- 5 large brown onions, not too thinly sliced
- 50ml vegetable oil
- 50g golden syrup
- Water (for deglazing)
Method / Instructions
- Heat the pan
Heat the oil in a large, wide skillet over high heat. - Start the onions hot
Add the onions. Cook on high, stirring, until they soften and start to take on a little colour. - Drop to low and go slow
Turn the heat down to a low simmer and cook for about 30 minutes, stirring occasionally.
Important: Don’t let them catch. If they burn, they go bitter — and there’s no rescuing that. - Bring the heat back up
Once they’re soft, golden, and starting to look sticky, turn the heat back up to high. - Deglaze for extra flavour
Add a splash of water and stir, scraping up the good bits from the bottom of the pan. - Add golden syrup and finish
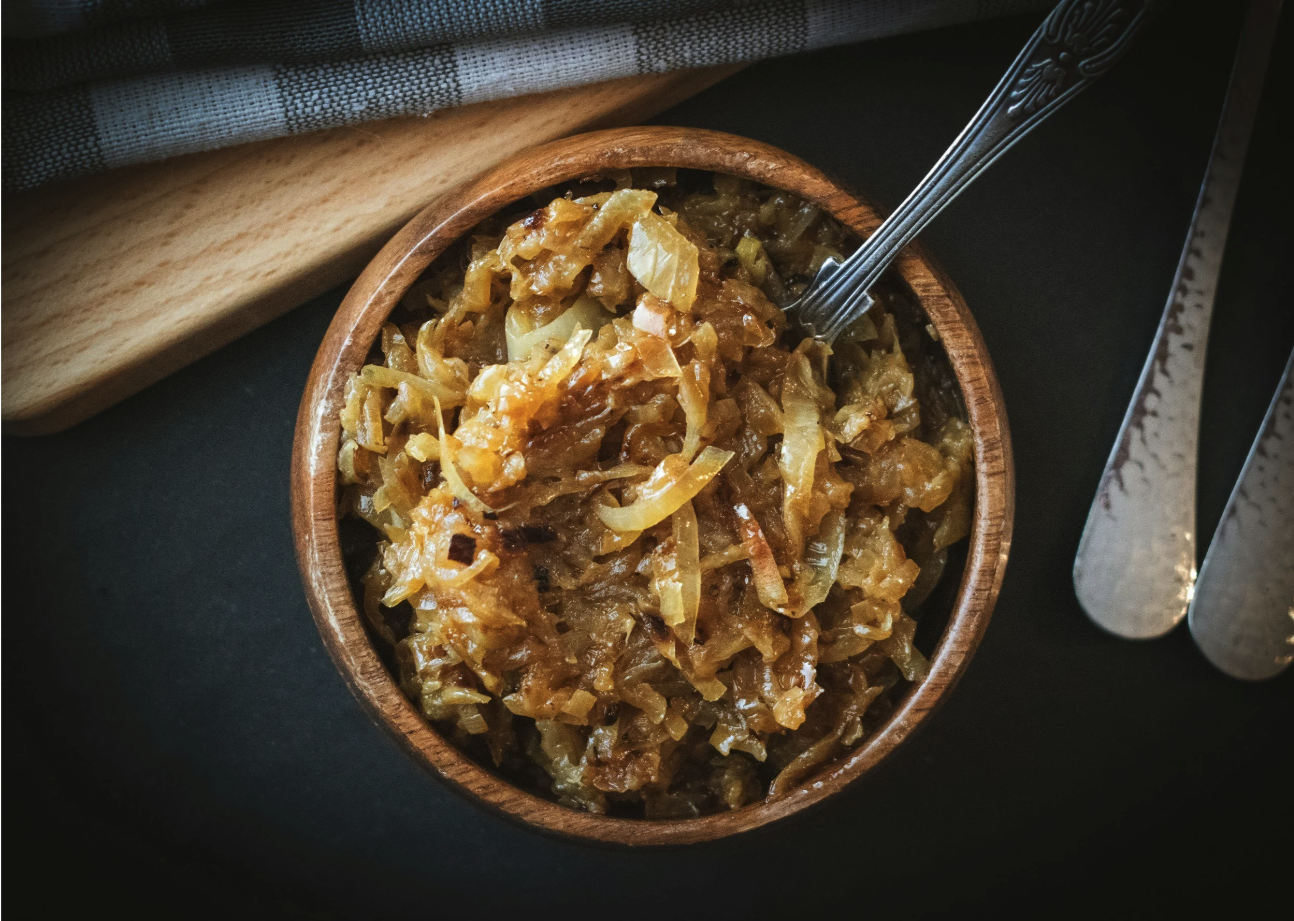
Stir in the golden syrup. Cook another 5 minutes, stirring, until you’ve got a jammy, glossy, caramel finish. - Cool and store
Spread them out (thin layer) to cool faster, then store.
Chef Tips / Skills Video Ideas (2–3 min)
- The slice thickness rule: thin = disappears, thicker = stays luscious.
- How to control heat so onions caramelise, not burn.
- Deglazing 101: turning “stuck bits” into flavour.
- Portioning and freezing “onion pucks” for instant weeknight wins.
Plating / Serving Notes
Caramelised onions aren’t really a “plating” thing — they’re a finishing weapon. A spoonful on the side of:
- corned beef, sausages, steak, schnitzel
- cheese boards, toasties, burgers
…and it instantly tastes like you’ve put in extra effort (without actually doing it on the day).
Optional Variations / Make-Ahead Hack
Make-ahead:
- Fridge: up to 7 days
- Freezer: up to 3 months
Freezer hack (my favourite):
Freeze in silicone muffin trays (or small scoops on baking paper), then pop the frozen portions into a zip-lock bag. Perfect 2–3 tbsp “flavour bombs” ready to go.
Skill Focus / Techniques
- Caramelisation: building sweetness and depth through controlled heat + time
- Heat management: knowing when to go high vs low
- Deglazing: extracting maximum flavour from the pan
- Batch prep mindset: one cook, weeks of payoff
Final Thought from Chef Ian
If you only prep one thing ahead, make it this. A spoonful of caramelised onions can turn an average dinner into a “how good was that?!” dinner — and it costs next to nothing. Low and slow, mate… that’s where the magic lives.
Chef Ian